Difference between revisions of "Vertical zoom on the timeline in DaVinci Resolve"
Jump to navigation
Jump to search
m |
m (→Video) |
||
| Line 7: | Line 7: | ||
=Video= | =Video= | ||
A video example on how to perform this action is available on our youtube channel: | A video example on how to perform this action is available on our youtube channel: | ||
https://www.youtube.com/channel/UC61hJ5Vd5PuYYyoH3e1SE1g | |||
The direct link to the video is the following one: | The direct link to the video is the following one: | ||
Youtube video | Youtube video | ||
Revision as of 07:09, 4 March 2022
Introduction
Vertical zoom on the timeline in DaVinci Resolve
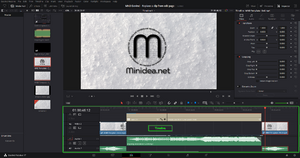
It can be useful to zoom on the timeline to better view its content. DaVinci provides two simple options two do so that are described below.
Video
A video example on how to perform this action is available on our youtube channel:
https://www.youtube.com/channel/UC61hJ5Vd5PuYYyoH3e1SE1g
The direct link to the video is the following one:
Youtube video
For additional information see also Add a clip to the timeline in DaVinci Resolve.
How to
Timeline view option
Actions:
- Open the edit page.
- On the top left of the timeline bar click on the icon "timeline view option".
- Identify the "track height" section.
- Use the sliders to adjust the size of the audio or video track.
Shortcut
Actions:
- Move the cursor of the mouse over the audio or the video lane.
- Hold shift and use the scroll of the mouse to adjust the height of the track in the timeline.
DaVinci Versions
This article applies to DaVinci Resolve version:
- 17.
Type of article
This article is classified as an elementary action.
